by John Meyerhofer
A new titles list is a great way for libraries to show off their new items, to demonstrate to faculty their requests are being purchased, and provide a tool for students to find new items at the library. In the physical library, a common tool for highlighting new titles is a book display while in the virtual world, a web page can achieve a similar result. However, many times lack of programming knowledge often prohibits libraries and librarians from implementing one. Intimidating descriptions of LAMP stacks, with PHP scripting and MySQL databases can often scare even the most technical librarian from attempting to build their own deployment. Currently most OPAC vendor systems don’t include viable options for deploying a new titles list either. Often times utilizing these programming tools means being proficient with extracting data from a catalog, importing that data into a database, and finally developing a web application to read, display, and maintain that data. Surprisingly this doesn’t have to be the case. At Macalester College, we were able to develop a relatively robust new titles web page with only some basic OPAC data, a Google Sheet, HTML, and a little JavaScript. In order to arrive at our end result, it’s important to look at the history of the previous new titles page and how it was structured and developed. We’ll also examine the reasons for moving to a simpler version. Finally, we’ll walk through the development of the new process and detail a typical procedure to update the new title page with new title data. Through these steps, we hope that many libraries will see this as a starting point to developing their own new titles list or re-examining their existing one.
History
At Macalester College, over the previous few years we had developed a new titles web page that used PHP to access new titles data in a MySQL database. This page was developed in-house and utilized a library server which was outside the traditional realm of the institutional servers and thus was lightly supported by Macalester’s Information Technology Services (ITS). This support meant there were backups of the server but no updates to the operating system or any of its applications. The existing process for updating the new item data involved first exporting data from OCLC’s WorldShare using the WMS Report Designer. Next, we took this data, which was in a tab-delimited file, and imported it into a MySQL database using a PHP script. This script did some text conversion as well as retrieved the new titles’ cover image. This process had worked well for the library during a one to two year timeframe with minor changes and enhancements.
Historically the DeWitt Wallace Library doesn’t purchase a large amount of new materials. Typically we see about two hundred and fifty new titles in a month with an average of three to four thousand in a year. The number of titles each week fluctuates during the academic year with the spring having more than the other seasons. This fluctuation is of course a result of many factors but like many academic libraries, static budgets and falling circulation have affected purchasing. With these kind of numbers throughout the year, updates to the new title page traditionally occur every other week. Finally, new item records are given a two to three day window for processing to ensure items on the web page are actually in the library.
Reasons for Change
Although the existing new titles page was working and satisfied our needs, we began to re-assess it due to several factors. First, and most important, was that ITS had informed us our server’s operating system was no longer going to be supported and thus was slated for retirement. Without support, we could no longer depend on the web pages and applications that were on that server. Besides the operating system, individual software programs were extremely old, too. In particular, PHP and MySQL, main components in the existing new title list, were several versions behind current acceptable ones. Without having updates to the operating system and main software running the new titles page, the library and the college were exposed to security risks and vulnerabilities.
With the impending retirement of our server, we needed a new home for the new titles page. Initially, there were many ideas entertained, including looking at another LAMP stack deployment or even a cloud based solution. However, to determine a more practical solution, we focused our criteria for our new titles page. First, ideally we wanted the new titles page to be integrated with our campus Content Management System (CMS). The existing new titles page, which lived outside our CMS, would have required extensive rework to make it match the campus template and be mobile ready. There are many benefits to integrating with our CMS (dotCMS). These include gaining the benefit of standard styling of the web page as well as instantly having the same look and feel of our existing library web page. Being a part of the CMS also gave us the security of backups, file versioning, and being under the campus’ umbrella of supported technologies and environments. We were also lucky in that our CMS allowed us to deploy pages with JavaScript. Our second criteria was a need for the new titles page to dynamically display data with pagination and filtering. These are features our users were accustomed to with the existing page. Third, we needed a place to store our new titles data that would allow us to quickly update and add items when new titles were purchased. In the past this was a MySQL database, but without this option, we wondered if there were other technologies that might be utilized that could satisfy, or at least mimic, a database’s functionality. Our final criteria was a need for the page to be fast, automatically scale with the addition of new item data, and be easy to maintain. Speed was paramount as most users won’t wait even a few seconds for a page to load. Scaling with the addition of data would be a benefit and ultimately help make the page easy to maintain. As with most projects that have any amount of system data, some manual work might be required, but keeping it to a minimum would help create a solution that was simple and easy to sustain. With all of these criteria combined, it was hard to imagine a solution that didn’t involve programming.
Awesome Table
Our first attempt, but ultimately a failed one, was to utilize the Awesome Table Google Sheet template. This was a fairly robust solution where data was housed in a Google Sheet and then included within a web page via an HTML iframe tag. The tool came with filtering, searching, and pagination and seemed like a perfect fit, except that during our testing typical load times for the page averaged 12 seconds.

Figure 1. Awesome Table progress bar while loading (enlarge)
While loading the data from the Google Sheet, the tool did display a small blue progress bar to show that it was processing, however, the 12-second delay was too long and we decided to look elsewhere for a solution.
A Solution Presents Itself
After working with the Awesome Table product in which a Google Sheet was used to store data, housing the new titles data in a Google Sheet seemed like a solution to many of our proposed criteria. Housed in a spreadsheet, the data could easily be updated and new rows added, therefore addressing our criteria of maintainability. However, as we discovered with Awesome Table (or even researching other tools like Tabletop.js), the Google Sheet API, as others have pointed out, may not be production worthy. There is concern that Google could put rate limits on access, may be adding extra load to the display, and with a publicly accessible Google Sheet, an ill-intentioned person could traceback the API calls to access the data.
The epiphany in finding a solution came when realizing that the Google Sheet housing our data could be used as a tool to create the HTML display as well. If we create HTML code that could then be copied into a CMS-housed page, although not automated, it could be a simple process to update the new item data and thus populate our new items page.
To achieve our vision, we needed a client-side tool that would create the pagination and filtering. A JavaScript tool seemed like it might be the best fit for our needs. Running locally meant it would likely be faster, and implementation would likely be easier as our CMS allowed us to implement JavaScript code. This line of thought led us to examine the List.js tool. List.js is a JavaScript file that can add searching, filtering, and sorting to an HTML item list or HTML table. Combined with the Pagination plugin, List.js ultimately satisfied our criteria of integration with our CMS, pagination, and filtering for our new titles page.
After deciding to use the List.js tool, the development path became fairly straightforward. First we would need to create an HTML page with the List.js and Pagination plugin. Next, we would get each item’s book cover image, which was not part of our data extract. Third, we would need to concatenate all of the data into an HTML title list that could be part of an include file. Finally, we would include that file into the HTML page to dynamically generate our new titles list. In the end we would have a Google Sheet that houses all of the data, an HTML file that lives in our CMS which displays the data, and an include file that contains the HTML new titles list which is dynamically included into the main HTML file. In this way we would compartmentalize the data, display, and include file.
Create the HTML File
To start, we built an HTML page that formatted a basic set of test data which allowed us to fine tune the display. Utilizing our campus pattern library, we quickly created an HTML item list of eight items that had book cover images, each to the left of the tile and author.
Next, we integrated the List.js and its Pagination plug-in into the page, allowing us to test the filtering by item type (i.e. Book, DVD, etc.) and purchase department (i.e. Chemistry, English, etc.). The filtering was accomplished by including these data values in the HTML with hidden tags. Even when hidden, List.js is able to use this data for filtering based on user choices.
<script src="list.min.js"></script>
<script src="list.pagination.min.js"></script>
<style>
.pagination li {
display:inline-block;
padding:5px;
}
.active a {
font-weight: bold;
text-decoration: none;
pointer-events: none;
cursor: default;
color: #EA6506;
}
</style>
<div id="new-arrival-list">
<p>
<form class="inline-form">
<!-- label class="control-label" for="select_element_h">Search for a Title or Author:</label>
<input type="text" onfocus="clearForm();" style="width:50%;" placeholder="Search for a Title, Author, or Department..." class="search" />
<br / -->
<label class="control-label" for="select_element_h">Select a department:</label>
<select name="fund" class="fund" id="fund" onfocus="clearForm();" onchange="listObj.search(this.value, ['dept']);">
<option name="all" value="all">Select a department...</option>
<option name="bame" value="American Studies">American Studies</option>
<option name="bant" value="Anthropology">Anthropology</option>
<option name="bart" value="Art">Art</option>
<option name="balc" value="Asian Languages and Cultures">Asian Languages and Cultures</option>
<!-- option name="bbio" value="Biology">Biology</option -->
<option name="bche" value="Chemistry">Chemistry</option>
<option name="bcla" value="Classics">Classics</option>
<option name="bdan" value="Dance">Dance</option>
<!-- option name="beco" value="Economics">Economics</option -->
<option name="bedu" value="Education">Education</option>
<option name="beng" value="English">English</option>
<option name="benv" value="Environmental Studies">Environmental Studies</option>
<option name="bfre" value="French">French</option>
<option name="bgeg" value="Geography">Geography</option>
<!-- option name="bgel" value="Geology">Geology</option -->
<option name="bger" value="German">German</option>
<option name="bspa" value="Hispanic Studies">Hispanic Studies</option>
<option name="bhis" value="History">History</option>
<option name="bint" value="International Studies">International Studies</option>
<!-- option name="blat" value="Latin American Studies">Latin American Studies</option -->
<option name="blin" value="Linguistics">Linguistics</option>
<option name="bmat" value="Mathematics and Computer Science">Mathematics and Computer Science</option>
<option name="bhum" value="Media and Cultural Studies">Media and Cultural Studies</option>
<option name="bmus" value="Music">Music</option>
<!-- option name="bneu" value="Neuroscience">Neuroscience</option -->
<option name="bphi" value="Philosophy">Philosophy</option>
<option name="bphy" value="Physics">Physics</option>
<option name="bpol" value="Political Science">Political Science</option>
<!-- option name="bpsy" value="Psychology">Psychology</option -->
<option name="brel" value="Religious Studies">Religious Studies</option>
<option name="brus" value="Russian">Russian</option>
<option name="bsoc" value="Sociology">Sociology</option>
<option name="bthe" value="Theater">Theater</option>
<option name="bwom" value="Woman/Gender Studies">Woman/Gender Studies</option>
</select>
<br/><label class="control-label" for="select_element_h">or Select a Format:</label>
<button class="button" type="reset" onClick="formatSearch('Video_DVD');">DVD</button> <button class="button" type="reset" onClick="formatSearch('Book');">Book</button> <button class="button" type="reset" onClick="formatSearch('Book_Digital');">eBook</button> <button class="button" type="reset" onClick="formatSearch('Music_CD');">CD</button>
<button class="button orange-button icon-to-right icon-refresh" type="reset" onClick="clearForm();">Reset</button>
</form>
</p>
<hr>
<ul class="newsListing list clearfix">
#dotParse("/library/new/new_arrival_list.vtl")
</ul>
<h3><ul class="pagination"></ul></h3>
</div>
<script>
var paginationOptions = {
name: "pagination",
paginationClass: "pagination",
innerWindow: 2,
outerWindow: 2,
left: 1,
right: 1
};
var listOptions = {
valueNames: [ 'name', 'dept', 'type' ],
page: 8,
plugins: [
ListPagination(paginationOptions)
]
};
var listObj = new List('new-arrival-list', listOptions);
//added for URL parm passing of department
//ex: http://www.macalester.edu/library/new/index.html?dept=American%20Studies
//ex: http://www.macalester.edu/library/new/index.html?dept=Chemistry
var urlDept = getQueryVariable("dept")
if (urlDept != "") {
listObj.search(urlDept, ['dept']);
$('select').val(urlDept);
}
function clearForm() {
listObj.search();
$('select').val('all');
$('input:text').val('');
}
function formatSearch(p1) {
clearForm();
listObj.search(p1, ['type']);
}
function getQueryVariable(variable) {
var query = window.location.search.substring(1)
var vars = query.split("?");
for (var i=0;i<vars.length;i++) {
var pair = vars[i].split("=")
if(pair[0] == variable){
if(pair[1].indexOf('%20') != -1){
console.log(pair[1].indexOf('%20'))
var fullName = pair[1].split('%20')
console.log(fullName)
return fullName[0] + ' ' + fullName[1]
}
else {
return pair[1];
}
}
}
return(false)
}
</script>
<p style="font-size:small;">The New Arrival page displays the new items from <a href="http://www.macalester.edu/">Macalester’s</a> <a href="http://www.macalester.edu/library/">DeWitt Wallace Library</a> for the 2016-17 academic year. Powered by <a href="http://www.listjs.com/">List.js</a> with images provided by <a href="https://www.oclc.org">OCLC</a>.
</p>?
One thing to note is the “#dotParse(“/library/new/new_arrival_list.vtl”)” line of code which acts to include the separate HTML list items file. With this implementation, going forward to update the page with new items, we would only need to add new HTML list items to that file. Here is an example of a final HTML item list code for one new item:
<li>
  <img alt='cover' style='height:96px; width:72px;' class='boxed-imagesm left'
    src='http://coverart.oclc.org/ImageWebSvc/oclc/+-+4626438_70.jpg'>
  <a class='name' target='_blank'
href='https://macalester.on.worldcat.org/oclc/3891719'>
    The Mongol world empire, 1206-1370<br/>
    by John Andrew
  </a>
  <p class='dept' style='display: none;'>Geography</p>
  <p class='type' style='display: none;'>Book</p>
</li>
In our Google Sheet, using string functions, we would concatenate the data from each item with the required HTML tags to get an HTML item list code. The HTML file with the List.js and pagination code, and the file with the HTML item list code would both be housed in our CMS.
Item image
Before we discuss how the new items cover image is retrieved, it should be mentioned that the DeWitt Wallace Library at Macalester College was able to work with OCLC to secure approval to use their images in our new titles web page. The method we use is inline linking, or hotlinking. From our web page, we reference the URL of OCLC’s image. An image appears to be part of the new titles web page, but only virtually, in the sense that the image file is not physically present on a Macalester server. The actual location of the image file is at OCLC and no downloading or copying of any images occurs using this method.
Besides the cover image, most of the required information needed for the new items page is within our exported data. That exported data is kept in a Google Sheet and over time new item data is added to it. However, to get the item’s image we need to perform a different kind of search in a separate Google Sheet. First, we copy just the new items’ OCLC numbers from the master Google Sheet into a column in a working Google Sheet. Because the importXML function we use to get the image will re-request the information when a Google Sheet is opened, we perform the image search separately from our master Google Sheet. This ensures that as the number of new items increase in the master file, the Google Sheet isn’t calling that function again and again.
=importxml("https://macalester.on.worldcat.org/oclc/" &A1, "//img[@alt='Cover Art image']/@ng-src")
We use the importXML function to extract the image URL from each item’s web page. ImportXML is essentially opening the new item’s OCLC web page and using the XPath query language to search for the URL of the item’s cover art in the HTML. Performing this action for several OCLC numbers can take a while and some rows will be stuck in the “Loading…” phase. We found one to two hundred OCLC numbers may take up to an hour to populate.
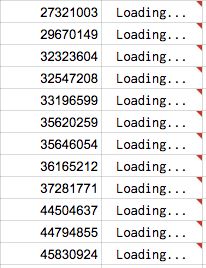
Figure 2. Waiting for the Google Sheet to find an item’s cover image
With patience all the image URL’s will be populated and can be copied over to the master Google Sheet. In this way, the image URL value, not the ImportXML function, is available to be included in our new title list.
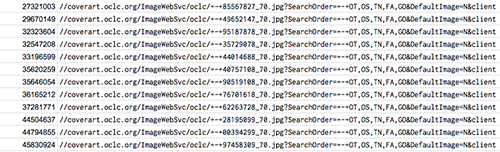
Figure 3. Cover image URLs populated (enlarge)
Creating the HTML list item
Lucky for us, the new process uses the same data export process with the WMS Report Designer in OCLC’s WorldShare. With our data exported, it is a simple process to copy the new rows into the master Google Sheet, adding them to the new items’ data. This file builds upon itself so new rows are just added to the end.
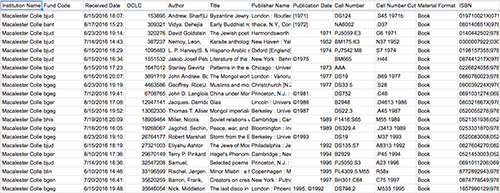
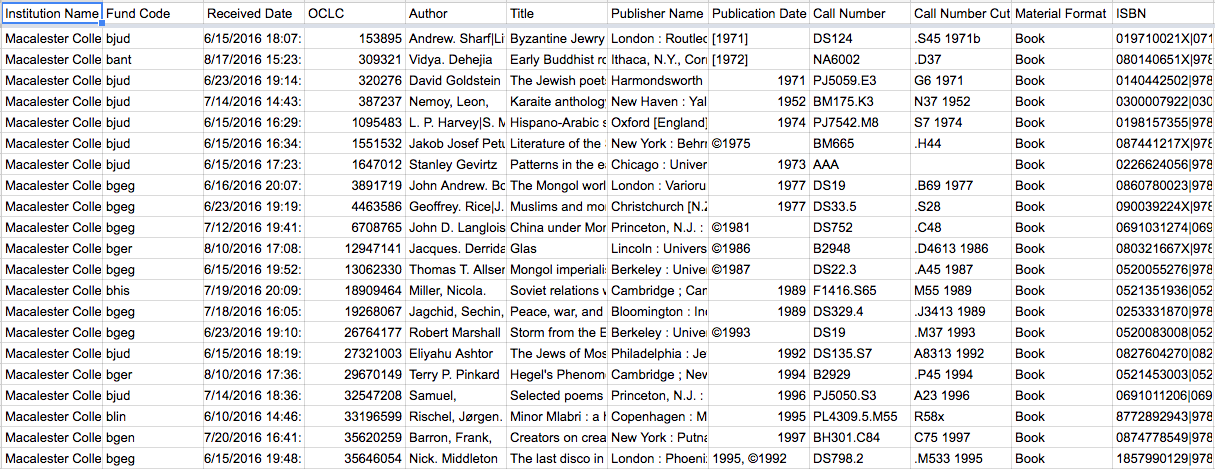
Figure 4. Google Sheet with item data (enlarge)
Most of the data itself is self-explanatory, but the “Fund Code” is a field that we use to designate which fund was used to purchase the new item and coincidentally it also represents the academic department. Utilizing a NamedRange in the Google Sheet, we are able to translate the Fund Code: for example, changing “bhis” to History.
With our image location and department, we can combine the data with the necessary HTML tags to generate the HTML item list. Our basic HTML display code consists of an item image, a title, an author, item type, fund code, and a link to our catalog. An individual item’s HTML code will look like this:
<li><img alt='cover' style='height:96px; width:72px;' class='boxed-imagesm left' src='URL TO IMAGE'><a class='name' target='_blank' href='https://macalester.on.worldcat.org/oclc/XXXXXXXXXX'>ITEM TITLE<br/>by ITEM AUTHOR</a><p class='dept' style='display: none;'>DEPARTMENT</p><p class='type' style='display: none;'>ITEM TYPE</p></li>
Next, to create the item link to our catalog, we utilize the OCLC number (ex: https://macalester.on.worldcat.org/oclc/10694032).
Finally with all of the necessary values populated, we can concatenate the data into one string.
=if(E95<>"",concat("by ",E95),"")
Resulting in HTML item list code for each item.
<li><img alt='cover' style='height:96px; width:72px;' class='boxed-imagesm left' src='http://coverart.oclc.org/ImageWebSvc/oclc/+-+4626438_70.jpg'><a class='name' target='_blank' href='https://macalester.on.worldcat.org/oclc/3891719'>The Mongol world empire, 1206-1370<br/>by John Andrew</a><p class='dept' style='display: none;'>Geography</p><p class='type' style='display: none;'>Book</p></li>
When each row’s data is combined and then included with the HTML file containing the List.js logic, the new titles page displays with the appropriate styling and logic. To finish, we simply select the entire column with the HTML list item code, then copy it into the include file. This results in a finished new titles web page.
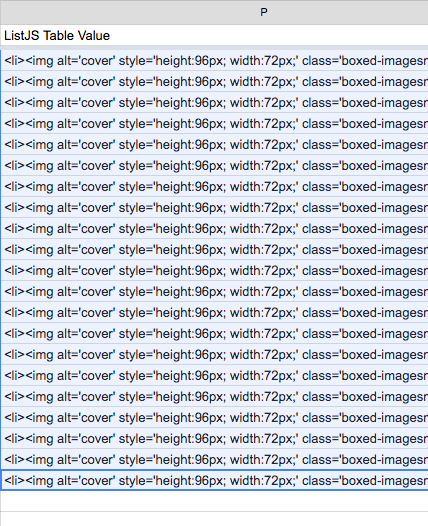
Example HTML item list code Figure 5.
Going forward, to update the new titles page with new data, we will only need to copy the new rows from the HTML items list column in the Google Sheet to the include file.
Final Thoughts
During a typical update process, which usually happens every other week, it might take 15-20 minutes to update the new items page. This isn’t continuous, as the image cover process can sometimes take an hour to retrieve two hundred cover images. However, the image URL retrieval doesn’t need to be monitored and can occur simultaneously to other work.
Also, prior to the addition of new titles, we also create a backup of the master Google Sheet that holds the data. This helps to ensure that if any problems occur during the update, we can revert back to a previous version.
With only four months using the new version, it’s hard to make any statements regarding increased or decreased use of the new titles page. The actual page-views of the new page are slightly higher than the previous system over a similar time frame, but more time is needed to see if this is a bigger trend. In all honesty, the move to the new system wasn’t to garner more views, although that would be nice too, but, as mentioned elsewhere, the benefits were to eliminate the security risks of the old server, improve the update process, and integrate the new titles page into our CMS.
Finally, as a proof of concept, in our testing we duplicated the number of rows to match a typical year’s worth of new items, about four thousand, and List.js performed wonderfully with only a 2-3 second delay, depending on the browser, in generating the web page.
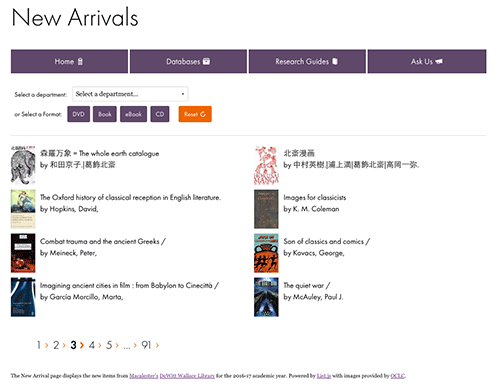
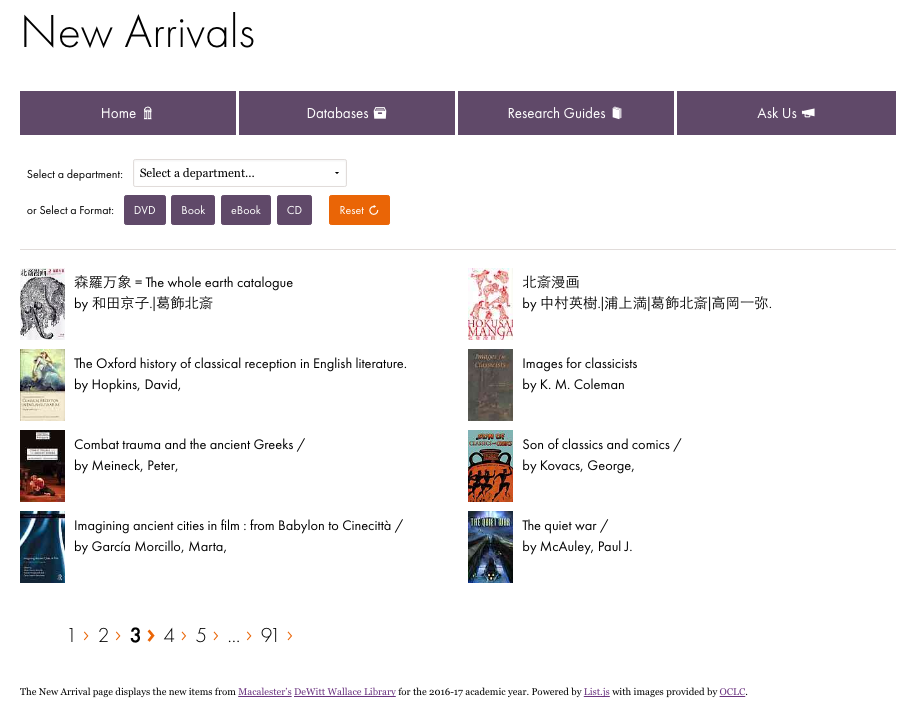
Figure 6. The Macalester New Arrivals web page (enlarge)
In conclusion, using List.js, Google Sheets, HTML, and a little JavaScript, we now have a new titles page that satisfies many of our criteria. Although not optimal, in that some steps require manual intervention, the time vs. cost benefit seems to be justified and appropriate. As with most website projects, the future will allow for changes to the current process, possibly automating some parts that are currently manual in nature. Again, we hope for those libraries without access to IT staff or without advanced programming knowledge, this article provides a viable option to implementing a new titles list.
About the Author
John Meyerhofer is the Digital Scholarship Librarian for the DeWitt Wallace Library at Macalester College in St. Paul Minnesota.

Subscribe to comments: For this article | For all articles
Leave a Reply